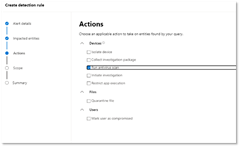
Detect and protect sensitive IT information

What we have seen is that organizations are often good at verifying permissions and access to their IT (security) systems, but what most organizations miss is to restrict and protect extracted data such as logs and reports from these systems. Information that contains both system information and user data that in the wrong hands can be used by criminals to map our IT environment and identify vulnerabilities or violate laws and regulations regarding sensitive user information.

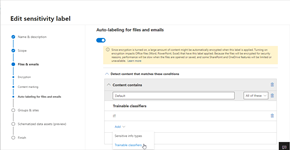
We need to support our analysts and IT staff to identify sensitive IT / System information, get the information correctly classified and protected. This has just become much easier! Since last week, we have new built-in trainable classifiers, where we have a classifier just for IT information. Trainable classifier is there to help us identify information based on analyzing existing information and using AI to find similarities with new information. You can read more about how trainable classifiers works and how to create your own classifiers in this blog post

The trainable classifier IT refers to information technology and cybersecurity topics such as network settings, information security, hardware and software issues. If we compare this trainable classifier with the Sensitivity info type “IP Address”, it only identifies IP addresses while this identifies the combination of network, hardware, software and user information.

Here is a list of all the new predefined trainable classifiers that meet several common business needs.

image

Trainable Classifiers can be used in combination with several services such as

  • Sensitivity Labels to detect, classify and protect information
  • Retention Policies to determine whether information should be deleted or retained for a defined period
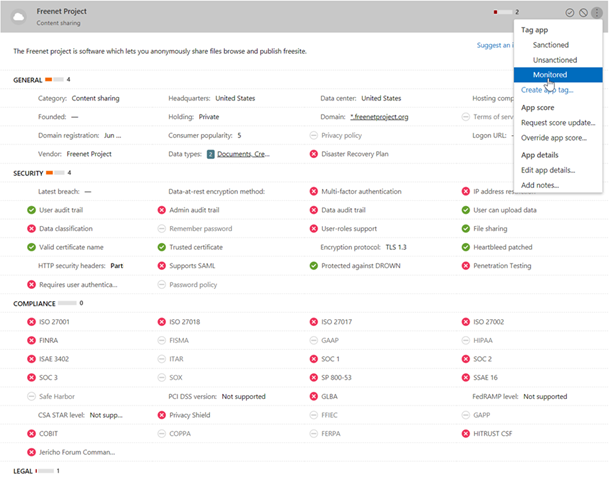
  • Microsoft Defender for Cloud Apps (formerly known as MCAS) which can scan connected cloud services to identify and (for certain services such as M365) automatically classify / protect data-at-rest information.

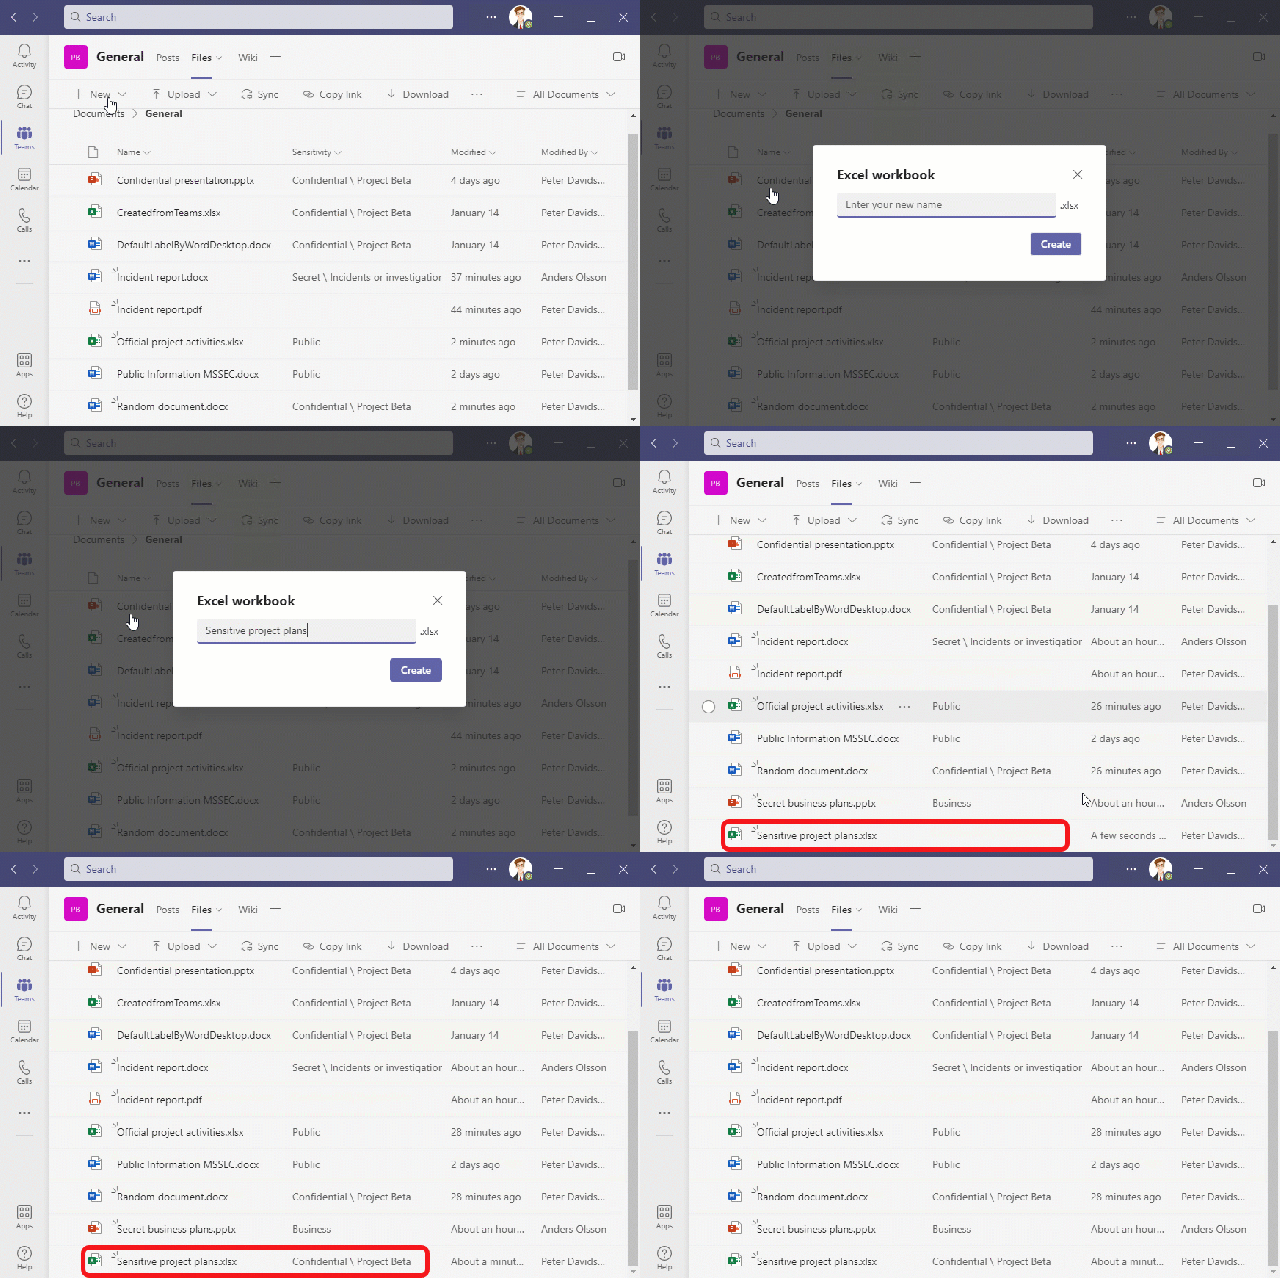
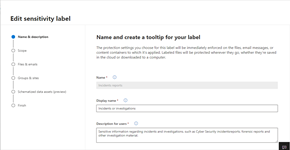
I have configured a sensitivity label to support the organization to classify and restrict sensitive IT information such as incident reports and forensic reports. The label is set to automatically detect the information and recommend the end user to classify with this label.

image image

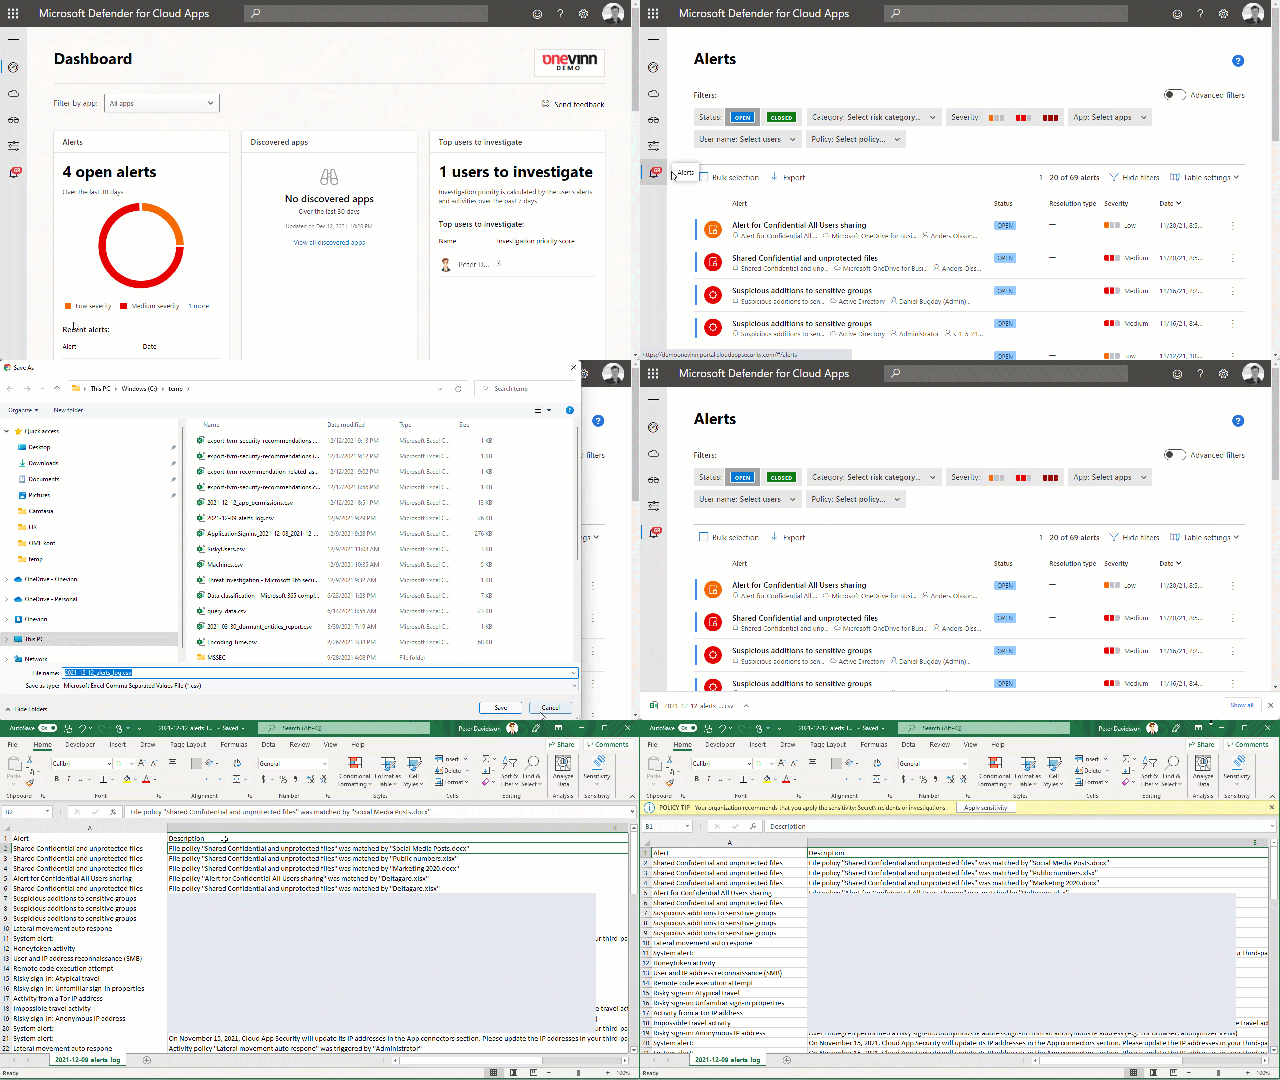
For example, if someone download alerts reports including sensitive security/compliance incidents from the Defender portals and open them in M365 apps, the user will be prompted to use this label.

image image

Detect sensitive IT information from MCAS

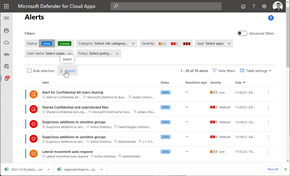
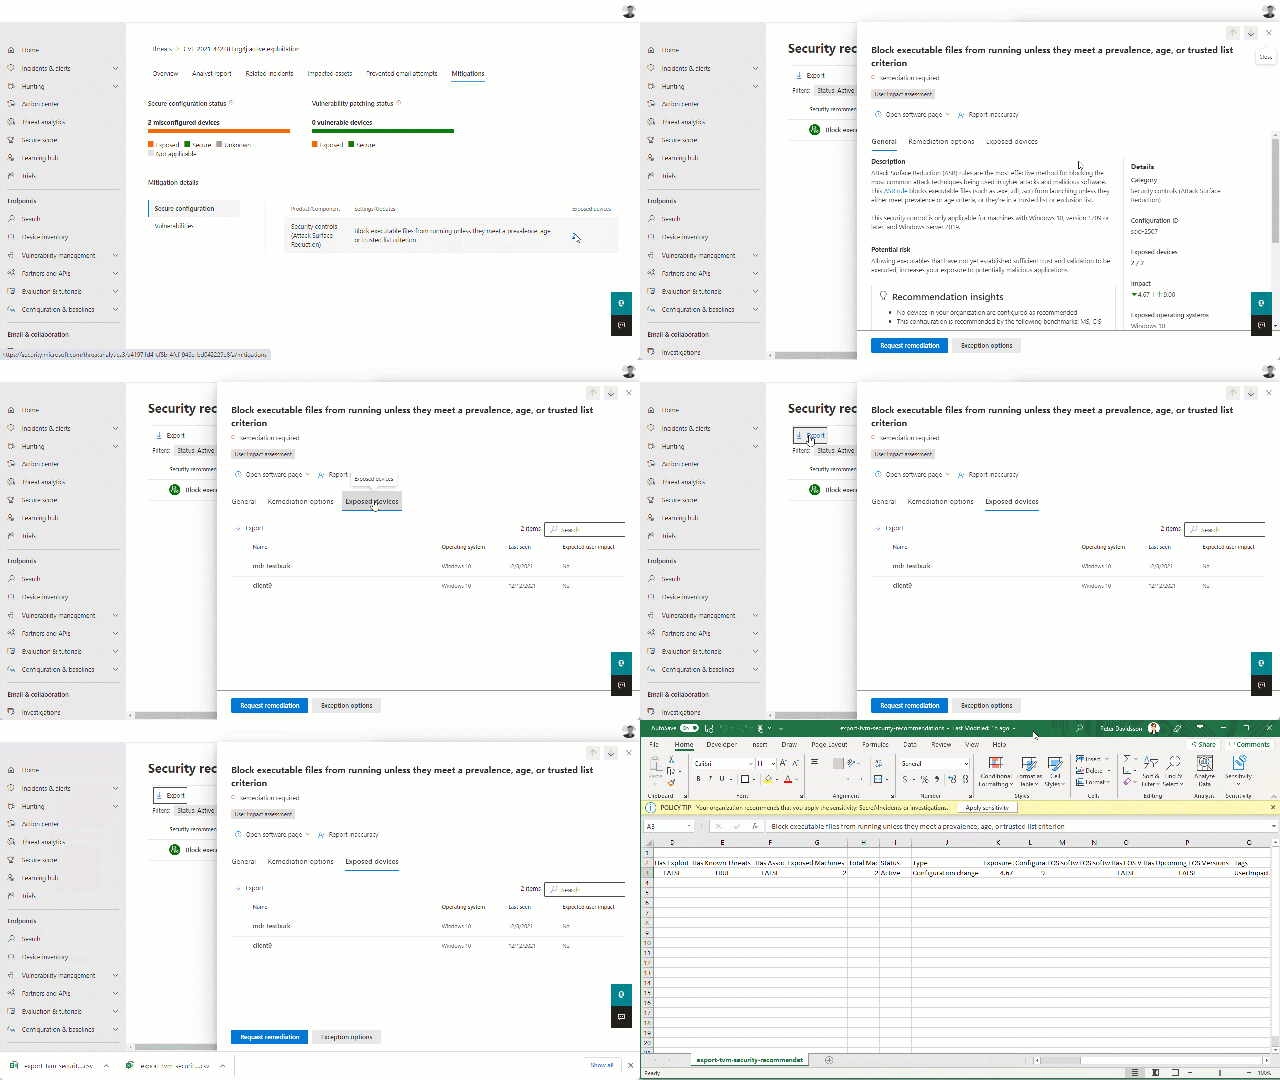
In this example I download threat analytics information around the Log4j exploitation including exposed devices.

Detect sensitive IT information from Defender

The limitation with recommended and auto labeling is that csv files are not supported, the reports / logs need to be in xlsx or docx format.

However, we can both identify and restrict the rights of these files.

Identify sensitive IT information at rest.

As I mentioned earlier, we can use Microsoft Defender for Cloud Apps (MCAS) to identify and act on information found by trainable classifiers.

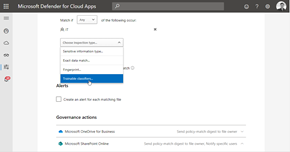
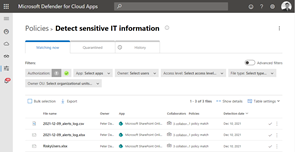
By creating an information protection policy, we can retrieve Trainable classifiers as conditions. The result is that we will identify all files located in SharePoint / Teams / OneDrive that contain this type of information. Here we can identify data that is also in other formats, such as csv files.

image image

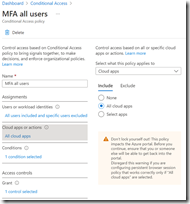
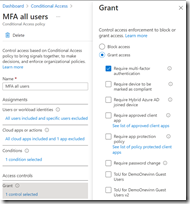
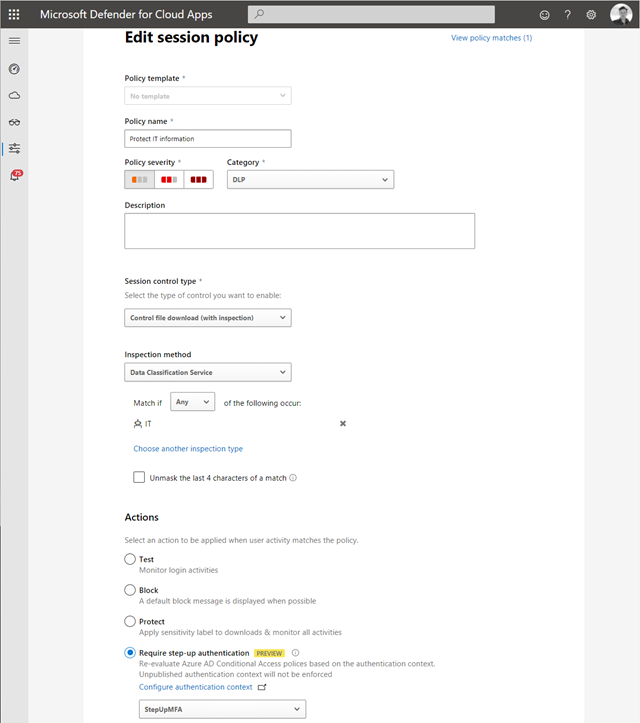
Since we have support to use the trainable classifier with Microsoft Defender for Cloud Apps we can also create session policies to define rules with Conditional access for this information. We can for instance block download or access from unmanaged devices. In this session policy I require MFA to be able to download files including sensitive IT information

image

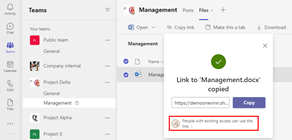
The result looks like this where files including sensitive IT data require higher security verification to be downloaded

Detect sensitive IT information session

Publicerat i Microsoft Information Protection | Märkt | Lämna en kommentar

Attack Simulation Training

For decades successful intrusions have occurred by tricking a user to either execute something or leak sensitive information like passwords or other secrets.
As our security solutions are improved and protection increases, we can clearly see how attacks in the form of social engineering like phishing (Email/IM), smishing (SMS), vishing  (Voice calls) increases.

Basically, if the attacker wants something that could be hard to get by attacking a system it is often easier to contact some internal user(s) either by email/IM or phone and let them do the work. Like getting someone from the inside to open the locked door to your environment.

If we look at how most ransomware attacks are performed, it is usually about tricking a user into clicking on a link or executing a code. This concerns both users in working life and in private, where we know that the consequences can be devastating.

So, what can we do to prevent this?

It’s mostly about education, training, and awareness! We need to continue educating our new and existing employees. Teach them how to identify anomalies in the message so they become more careful. They need to be able to validate the sender, the text and above all the reasonableness/probability of the message they receive.
This need to be done with a combination of training and practice.
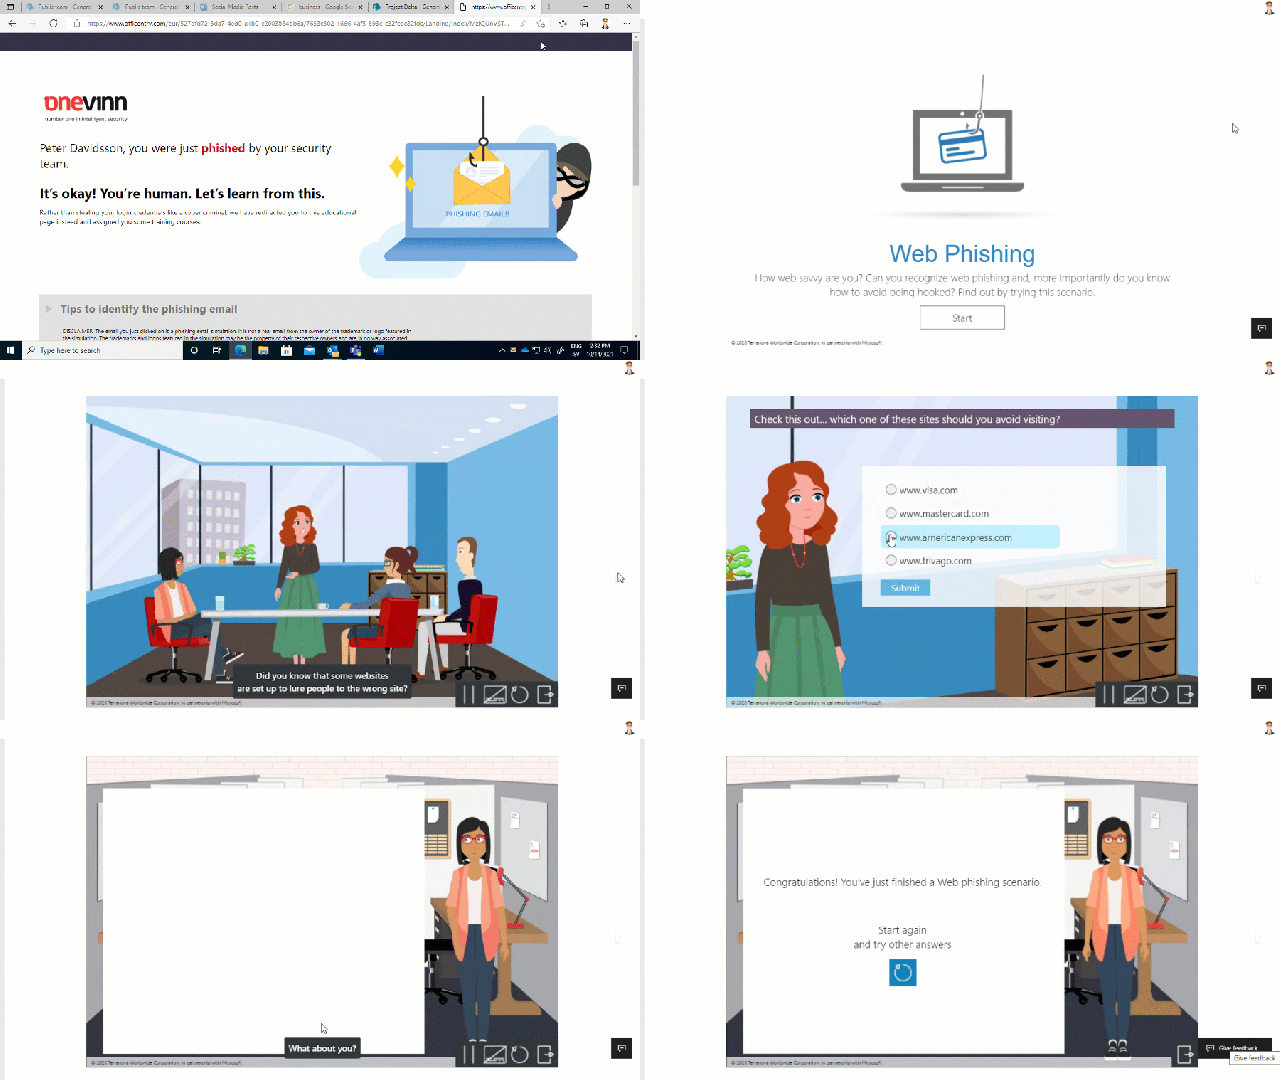
This is where Microsoft Defender Attack Simulations comes in. Attack simulation training in the Microsoft 365 Defender can run realistic attack scenarios in your organization. These simulated attacks can help you identify and find vulnerable users to prevent a real attack.image

A simulated attack like this phishing attempt from DHL can either be based on a predefined template

Attack simulation also allows us to customized one in a local language, in this case from the local service desk.

AttackSimulationEmailCredTheft

We also get predefined trainings to choose from to educate the users.

AttackSimulation2

Note that this video is fast-forwarded and cropped to show the user experience.

Let’s take a look how this is done from the M365 Defender Portal

We find Attack simulation training on the Email & Collaboration chapter in the Security portal.
Here we can simulate attacks and follow up the result of current and previous simulations.

image

This solution is continuously updated to reflect several of the attacks we see in real life.

At the time of writing, we have the following techniques to choose from when simulating an attack.

image

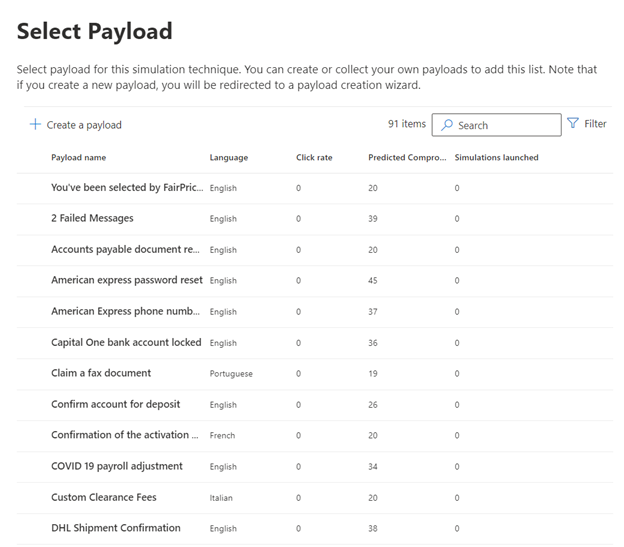
For the moment we have 91 prepared payloads that we can choose from.

image

We also have the possibility to create our own payload. This can be helpful for simulating a scenario from our own organization as well in our own language.

We define what source the email should have; we can set whatever email address we like for the purpose of the simulation

image

We can either import an existing email or create one our self and attach a phishing link

image

Based on the simulated technique we got recommended trainings to choose from.

image

We can assign the training to either all users or only the one that got phished (clicked on the email or shared their credentials)

image

We can customize the existing default landing page, create our own or use a custom URL.

image

We can schedule the training and make it region aware to reflect real case scenarios.

image

Will my email protection solution block these emails?

No, these emails are placed directly in the user’s inbox and never passes the Exchange/Mail servers.

3 important steps to get started

  1. Plan your simulation well, make sure it sanctioned by the business and its management
  2. Combine the training with information campaigns and explain the “why” and background why this is important
  3. This is not a one-shot, the training must be recurring in order to maintain both the attention of our existing and new employees.
Publicerat i Microsoft Defender | Märkt | Lämna en kommentar

Microsoft 365 Defender – The success story from Forefront Stirling

Svenska – English

 image_thumb[2]I have now been working for over 15 years with Microsoft security solutions and I have just been recognized as a Microsoft MVP (Most Valuable Professional) for the 11th year in a row.

It is now that I am starting to feel old, but also a little nostalgic and above all proud to have been involved in this success story.

I started my work with a solution called ISA (Internet Security & Acceleration) Server in 2003 which later became Microsoft Forefront TMG (Threat Management Gateway). In 2010, I got a job for Microsoft where I was on site in Redmond / Seattle and developed the test questions for an upcoming certification/exam within Forefront. The following year, I was rewarded as a MVP within Microsoft Forefront. However, this exam was never released publicly and a few years later, Microsoft dropped the Forefront investment. I continued to work with Microsoft’s new security solutions and was instead recognized as a MVP within Enterprise Security for a year or so until Microsoft started developing services in the cloud. I was involved from the start and was rewarded as a MVP within Enterprise Mobility (+Security).

During this journey, I’ve followed the evolution from Forefront to what is today called Microsoft 365 Defender.

12 years ago, Like Defender, Forefront was a product family with different security solutions for different services, where Forefront TMG was the firewall and proxy solution, Forefront for Exchange / SharePoint protected our e-mail and collaboration services to Forefront Client Security which protected our clients. At this time, everything was locally installed services, and we had no cloud services that we needed to protect.

Above all, I remember Forefront Stirling which was the code name of a beta project that I imagewas very committed to. It was about sharing signals between all Forefront Products. The aim was to prevent an attack by means of the cooperation of all systems. For example, if a malicious file was found by Forefront on a Client, an alert went to Forefront for Exchange that blocked outgoing e-mail from this user to prevent the spread. The TMG firewall was able to prevent traffic from the client to block a hacker from getting a session against the infected client.

Microsoft realized that it is not enough to have a security solution for each service, but also that these solutions must communicate with each other to detect and prevent an attack.

Microsoft was pioneers with this idea and far ahead of its competitors.

However, the market was not quite ready yet.
A challenge with the intended solution was how IT departments often worked at this time. Especially in large organizations, there were different teams that worked and were responsible for different things, everything from the network team to those who handled server solutions (Exchange, SQL etc.) and the clients. IT security was not part of their work and where usually a separate team (if it even existed) Back then there was a resistance that someone outside the team would gain access or interfere with something that was their responsibility.

A lot has happened in these 12 years.

This beta project, Forefront Stirling did not become a reality… until now!

IT environment changes

Our IT environment has undergone a major change in recent years. Most organizations today have more critical services in the cloud than in local infrastructure. Our users are connected from different types of devices and work more remotely than from an office. The identity is called the new perimeter. Furthermore, we live in an information age where organizations’ information is created at a higher rate than ever and stored in different places. An interesting fact is that 90% of all the world’s information has been created in the last two years.

The threats and attacks have changed

Intrusions / attacks have also changed at the same rate where we see more sophisticated attacks. Attacks that are no longer based on malicious code to the same extent but instead on manipulation and use of the organization’s existing services.

In other words, we need protection that responds to the new way of working, the hybrid IT environments, and the current threats.

Microsoft 365 Defender

In the same way as Forefront once was, Defender is now a product family with custom protection for different parts of our environment. Like Forefront Stirling, Microsoft 365 Defender connects these solutions to share signals and jointly prevent an attack. Defender and what goes under MCAS today also monitors cloud services other than just Microsoft, such as Google, DropBox and Amazon. Defender for EndPoint is expanded to several platforms to also monitor tablets and phones from iOS, Android and Linux. To be able to detect and prevent an intrusion, we need to monitor all our services and devices.

Given how we are currently connected and current threats, the measures have also been fig25adapted. For 10 years ago, it was relevant to block something in an external firewall because our devices were usually connected from an internal network/local office. Today, the most common action is to block an identity or isolate a device no matter where it is connected. Zero-trust is a concept that every organization should adapt as we can no longer rely on a certain network or device.

Microsoft began as a pioneer with innovation and is now a world leader in IT security solutions. It’s a satisfying and amazing feeling to be able to implement these solutions, see how we can detect intrusions in good time and how our MDR (Microsoft Detect & Response) team can stop many of these attacks before they do any damage.

2021 Gartner Magic Quadrant for Endpoint Protection Platforms. Quadrants include Leaders, Challengers, Niche Players, and Visionaries.

Publicerat i Microsoft Defender | 1 kommentar

Microsoft 365 Defender – Historien från Forefront Stirling

Swedish – English

imageJag har nu jobbat i över 15 år med Microsofts säkerhetslösningar och jag har precis blivit utnämnd till Microsoft Most Valuable Proffesional, MVP för 11:e året i rad.

Det är nu jag börjar känna mig gammal, lite nostalgisk men framför allt stolt över att ha varit med längs denna resa.

Jag började jobba med ISA (Internet Security & Acceleration) Server som sedan blev Microsoft Forefront TMG (Threat Management Gateway).

2010 fick jag ett jobb för Microsoft där jag var med i Redmond/Seattle och tog fram testfrågorna till en kommande certifiering inom Forefront. Året efter blev jag blev utnämnd MVP inom Microsoft Forefront. Den här certifieringen släpptes dock aldrig offentligt och några år därefter la Microsoft ner Forefront-satsningen. Jag fortsatte att arbeta med Microsofts nya säkerhetslösningar och blev i stället utnämnd till MVP inom Enterprise Security i något år till Microsoft började utveckla sina molntjänster. Här var jag med från start och blev MVP inom Enterprise Mobility (+ Security). Under den här resan har jag sett det som idag går under Microsoft 365 Defender växa fram.

Forefront var för 12 år sedan likt Defender en produktportfölj med olika säkerhetslösningar för olika tjänster, allt ifrån Forefront TMG som var brandväggen och proxylösningen, Forefront for Exchange/SharePoint som skyddade våra e-post och samarbetstjänster, till Forefront Client Security som skyddade våra klienter. På den här tiden var allt lokalt installerade tjänster och vi hade inga molntjänster som vi behövde skydda.

Framför allt minns jag Forefront Stirling som var kodnamnet av ett beta-projekt som jag imagevar väldigt engagerad i. Det gick ut på att dela signaler mellan alla Forefront Produkter. Syftet var att kunna förhindra en attack med hjälp av att alla system samarbetar. Exempelvis om det kom in skadlig kod som påträffades av Forefront på en klient gick ett larm till Forefront for Exchange som blockerade utgående e-post från denna användare för att motverka spridning via e-post. TMG brandväggen kunde förhindra trafik från klienten för att blockera att en hacker fick upp en session mot den infekterade klienten.

Microsoft insåg att det inte räcker att ha en säkerhetslösning för varje tjänst utan också att dessa lösningar måste kommunicera med varandra för att tillsammans detektera och förhindra en attack.

Microsoft var tidiga med den här idén och långt före sina konkurrenter. Dock var marknaden inte riktigt redo än. En utmaning med den tilltänkta lösningen var hur IT avdelningar ofta arbetade på den här tiden. Framför allt i stora organisationer fanns det olika team som jobbade och ansvarade för olika saker, allt ifrån nätverksteamet till de som hanterade serverlösningar och klienterna. IT-säkerhet var inte en naturlig del av dessa team, utan var oftast ett separat team (om det ens existerade). De fanns ett motstånd att någon utifrån teamet skulle få tillgång eller påverka något som ansvarades av respektive team.

Beta projektet Forefront Stirling blev inte verklighet… förrän nu!

Vår IT-miljö har förändrats

Vår IT-miljö har genomgått en stor förändring under de senaste åren. De flesta organisationer har idag mer kritiska tjänster i molnet än i lokal infrastruktur, våra användare är anslutna från olika typer av enheter och jobbar mer på distans än från ett kontor. Identiteten kallas för den nya perimetern. Vidare lever vi i en informationsålder där organisationers information skapas i högre takt än någonsin och lagras på olika platser. Intressant fakta är att 90% av all världens information har skapats under de senaste två åren.

Hoten och attackerna har förändrats

Även tillvägagångssätten för intrång/attacker har ändrats i samma takt, där vi ser mer sofistikerade attacker. Attacker som inte längre bygger på skadlig kod i samma utsträckning utan i stället om manipulation och nyttjande av organisationens egna tjänster. Allt för att kringgå klassiska antivirus-system och andra säkerhetslösningar.

Vi behöver med andra ord ett skydd som bemöter det nya arbetssättet, den hybrida IT-miljön och den rådande hotbilden.

Microsoft 365 Defender

På samma sätt som Forefront en gång var är nu Defender en produktfamilj med anpassade skydd för olika delar av vår miljö. Likt Forefront Stirling knyter Microsoft 365 Defender ihop dessa lösningar för att dela larm och gemensamt kunna förhindra en attack. Defender och det som idag går under MCAS övervakar även andra molntjänster än bara Microsoft, exempelvis Google, DropBox och Amazon. Defender for EndPoint byggs ut till flera plattformar för att övervaka även plattor och telefoner, allt ifrån iOS, Android och Linux. För att både detektera och förhindra ett intrång behöver vi övervaka alla våra tjänster och enheter.
Med tanke på hur vi idag är uppkopplade och rådande hotbild har även åtgärderna Actions based on detection from Defender
anpassats. För tio år sedan var det relevant att blockera något i en extern brandvägg eftersom våra enheter oftast satt uppkopplade från ett internt kontor. Idag är den vanligaste åtgärden att blockera en identitet eller isolera enhet oavsett var den är uppkopplad. Zero-trust är ett koncept som varje organisation bör arbeta efter då vi inte längre kan förlita oss på ett visst nätverk eller enhet.

Microsoft har gått från att vara tidiga pionjärer med nytänkande till att nu vara världsledande inom säkerhetslösningar. Det är en tillfredställande och fantastisk känsla att få införa de här lösningarna, se hur vi kan detektera intrång i god tid och hur vårt MDR (Microsoft Detect & Response) -team kan stoppa många av dessa attacker innan de gör någon skada.

2021 Gartner Magic Quadrant for Endpoint Protection Platforms. Quadrants include Leaders, Challengers, Niche Players, and Visionaries.

Publicerat i Microsoft Defender | 1 kommentar

Conditional Access for sensitive information

Every organization have some extra sensitive information that requires more caution from its users. Common examples that emphasize sensitivity can be for example extra authentication or terms of use approval before they get access to the information. It’s all about raising awareness to reduce the risk of accidental information leaks!

Microsoft has now started a preview of a solution that can assist with this.

In Conditional Access we can now configure conditions for accessing certain SharePoint Sites/Teams based on the sensitivity label of these sites.

In the example below the user can access Public, Business and Confidential sites but to get access to information stored in classified Secret sites, we require MFA.

CA to sensitive information

It works the same in Microsoft Teams where Multifactor authentication is triggered when you access the team sites files:

CA to sensitive information Teams

If we need to raise awareness with more clarity, Terms of Use is a good complement.

CA TOU to sensitive information

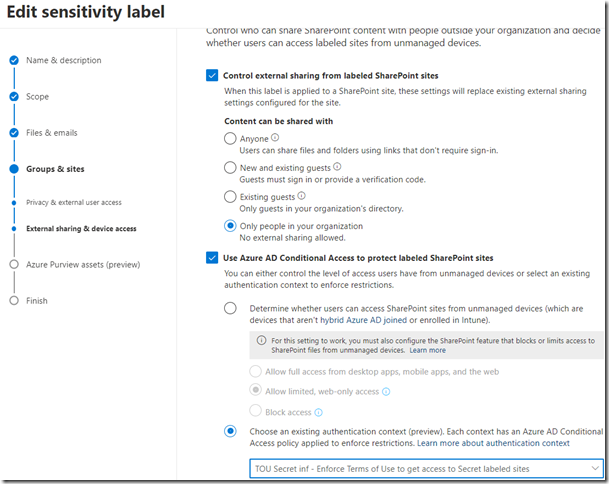
The trick is a new feature in Conditional Access called Authentication Context where we can define conditions and then add this context to the site and group setting of a Sensitivity label

Let´s have a look on the configuration

We first create a new authentication context from the new part in Conditional Access. In my example I call this “TOU Secret Inf”

imageimage

We can then create a Conditional Access Policy for this authentication context:

image

Then define the conditions we want, in my case MFA and Terms of Use:

image

We then configure the sensitivity label with this new authentication context that are now available (in preview)

image

If for some reason you haven’t started classifying your Sites (I’d mainly recommend starting with that), you can use the PowerShell management for SharePoint and use the Set-SPOSite command to define what Conditional Access policy that should be used for the specific site.

This is done in the format:

Set-SPOSite -Identity <site url> -ConditionalAccessPolicy AuthenticationContext -AuthenticationContextName ”same name as provided in AAD”

You have more information on docs

Good luck Smile

Publicerat i Microsoft Information Protection | Märkt | Lämna en kommentar

MCAS and AAD Identity Protection threat detection and automatic response

Now it’s time for part 2 around MCAS. (Part 1)

This blog post is about threat detection and automatic response where we start with
Azure AD Identity Protection.

AAD Identity ProtectionAzure AD Identity Protection monitor and responds on threats against our Azure AD identities. Based on behavior and existing information from Microsoft graph (that analyses 6.5 trillion signals per day) our sign-ins and users get a risk investigations score. The risks are categorizes into three tiers: low, medium, and high. We can define a Sign-in risk policy that either enforce MFA or block the specific sign-in based on the risk.
We can also define a User risk policy that act on the AAD account itself. My recommendation for most organizations is to enforce MFA followed by password reset for internal user accounts classified as High Risk. There is a low false-positive rate, and it indicates that the account has been breached in some way.

There are major benefits with the automatic risk detection that you get from Microsoft. However, there may be other signals and activities where you want to impose the same consequence with enforced MFA followed by a password reset.

For instance, we have Defender for Identity (previously known as Azure ATP) that is cloud based version of the deprecated Advanced Threat Analytics, ATA. Defender for Identity detects threats against our local Active Directory and its accounts in a similar way as AAD Identity Protection. Historically, the solution has ”only” monitored and alerted in case of intrusion and other suspected behaviors. But now we can also generate an automatic response based on activities from Defender for Identity.

This is done by Microsoft Cloud App Security (MCAS) that can integrate both Azure AD Identity Protection as well as Defender for Identity. This gives us insight where we can track events by the same user both in the on-premises environment and in the cloud.

There are cases where we have false positive of low-risk alertss in both solutions but if we see multiple alarms for the same user in different environments, it is probably something we should act on!

The strength with MCAS is also that it is integrated by default and monitors activities in Office 365 as well as the Azure platform but can also be extended to monitor other cloud services such as Google, Dropbox, Amazon, etc.

This allows us to follow through MCAS if, for example, we have less suspicious sign-in attempts to activities with data exfiltration from both on-premises file servers and other cloud services with the same account.  We can automatically ACT on these activities with MCAS

Let’s take a look at MCAS and the new Policies categorization.

Here we find the threat detection category, which includes, among other things, the standard policies imported from AAD Identity Protection and Defender for Identity.

image

We also have the option to create our own activity policies based on activities from the different sources and best of all, we can also configure an action.

As you can see in the image above, we have an Action column.

If we start by looking at a policy that triggers potential ransomware activities. In this case, if files with common ransomware file extensions are detected, we have defined an action for this.

image

Although it is rare for an account to be hijacked during a ransomware incident, there is reason to reset the user’s password. As in this example, we will stop syncing data for this user when this alarm is triggered.

image

We can, among other actions, impose Confirm user compromised.

The reason I started this blog post with AAD Identity Protection and recommended settings for a User Risk policy is because this is a prerequisite for this action to work.

Based on whether we have configured the User Risk Policy to block the user account or enforce the password reset, we get this result when the MCAS policy triggers.

When this happens, we can see that the user loses all access to Office 365 and for example that OneDrive stops syncing data.

MCAS-AADIDPRansomwareIn larger environments, there is a longer delay than the example above before the policy is triggered!

clip_image001[8]We had also triggered an alert (which in itself cannot be read until the current user has the right to reach their email again) but the alert could also be sent to someone’s manager.
The advantage of a custom notification is that we can customize the explanation to why an account is forced to change a password.


The Security Operation team can monitor this event either through the MCAS policy or through AAD Identity Protection.

image

There has also been a long-awaited Policy where I would recommend some actions.

clip_image002MCAS calculates an investigation priority score based on all signals of the monitored services for all identities in our environment. The MCAS dashboard includes a top list of accounts with the highest risk score. This is not something that previously existed as a dedicated alert.

We have now a new Policy in preview called Investigation Priority Score Increased that alerts if a user has a hefty increase in risk score.

image

Here I have some recommended settings to evaluate this. It is common for service accounts and other non-user accounts to be detected so my recommendation is to evaluate this on a defined group of user accounts.
image

We can then automate an action that both sends an alert and enforce the user for MFA and Password Reset. When this is done it will automatically lower the user’s risk score.

MCASRiskScorePolicy

As our detect and response (MDR) team use to say,
happy hunting everyone!

Publicerat i MCAS | Märkt | Lämna en kommentar

MCAS session control for sensitive information

I’ll start by apologizing that there hasn’t been a blog post in a long time. Me and my family have been sick with COVID-19 but fortunately we have recovered, which we are grateful for.

This article will be the first of a series of articles around Microsoft Cloud App Security (MCAS).

MCAS is an extremely powerful tool that can, among other things, support maintaining business requirements over how we can control our information in/to different cloud services.

Three common business cases
Click on the video to see it with the correct resolution.

Block certain information to be uploaded to the cloud
This video shows how we allow/block upload to the cloud based on the sensitivity of the fileMCASBlockUpload2

Blocking certain information for cloud storage is a prerequisite for most of the organizations in the public sector to even start using cloud services.

The organization needs to have an information classification in place, which is always the first step to get control of their information.

We can then block certain sensitive information in different ways to be stored in the cloud. EndPoint DLP is most commonly used for managed devices, while MCAS is the perfect solution for setting the same regulatory framework for other non corporate devices.

Block download of sensitive information

This video shows how we allow/block download from the cloud to an unmanaged device based on the sensitivity of the fileMCASBlockDownload

We can use Sensitivity Labels to block downloads from sensitive Team and SharePoint sites, but if we want to control downloading based on sensitivity MCAS can achieve this. A good example is when there is public information that is allowed to be downloaded regardless of device and we want to make sure that sensitive information from the same Team/Site are blocked from being downloaded to, for example, a home computer.

Block sensitive information in chat

This video shows how we can block users from sharing passwords
MCASPasswordBlock

Another example concerns sensitive information written in posts/Chat where we may detect certain expressions indicating that a user is about to expose their password.

How does this work?

Let’s start by looking at how we can use Conditional Access and Session Control with a custom rule in MCAS.

To proxy the traffic, we start by creating a Conditional Access rule for the users and devices to which this should apply. In my case this affect all unmanaged devices accessing Office 365 SharePoint Online. We then Configure this as a Session rule with a custom policy.
image

This CA rule will redirect the session to MCAS. In MCAS we have created a couple of Session policies for the above scenarios.
image
If we take a look at the policy blocking uploading of sensitive data, we have defined the affected sensitivity labels that we want to block. We filter out the managed devices where we have EndPoint DLP to control the same thing. We have also created a customized block message for the end-users. It is very important that we clearly describe why something is blocked with guidelines on how to do instead or where they can find more information.

We can also create an alarm when this occurs for follow-up of this type of actions. In several cases, this can be a good start before we start blocking anything to get a good overview of the scope of this rule. As you can see in the above picture we got an overview of number of alerts that these policies triggers.

image

In the last video we see the end result of the above configuration when a user tries to access the URL – teams.microsoft.com
This URL gets redirected to .cas.ms and the user get information about that this access is monitored.

MCASSessionLogin

I hope this article has supported you in your efforts to maintain all business requirements

In the next article, we’ll take a closer look at how MCAS can detect threats and automatically mitigate them to protect our identities and our environment.

Stay tuned!

Publicerat i MCAS, Microsoft Information Protection | Märkt , , | 1 kommentar

Revoke access to protected documents

Back in the days with the old Azure Rights Management Services solution Microsoft introduced the functionality to both track usage and the possibility revoke access to RMS encrypted information.

This function was not initially added to the new Unified Labeling client because of the low usage frequency, which led to a low prioritization of the function.

There were also some privacy concerns for some organizations regarding tracking of encrypted documents since the end user easily could track who had opened a document and from where. As a result, these organizations disabled the track and revoke -feature.

In the public preview version of the current AIP Client Microsoft have now reintroduced a track and revoke feature. This enables users to revoke their protected documents. The tracking function is also in public preview for documents protected with this preview client. Tracking is only available for administrators and administrators can also revoke protected documents.

There are currently some limitations with the revocation functionality. To be able to explain this in the best way I prefer (as always) to do a deep dive and illustrate what happens in the background during both tracking and revocation. I will also give some workarounds for the current limitations. Let’s kick off and test the new Track and Revoke -feature.

To be able to test this you need to have the AIP client version 2.9 or later

To be able to revoke a file you need to be the one who applied the protection (or a global admin).

If you want to test this with a new document:

  1. Create a new document and apply any label with encryption/protection.
  2. Then you need to close the file and reopen it again.
    After this you will have a new option Revoke Access under the Sensitivity Button
    image

If you get annoyed that you needed to close and reopen the document, I will now try to explain the reason for this.

First of all, we are able to encrypt files when we are offline. This is done with help of the public organization key and the users certificate keys. These keys are cached on the device when the end-user connect to the AIP service the first time (this is called the bootstrap process).
This means that Microsoft are not aware of the files that we have encrypted.
Second of all, files that just have been protected and haven’t been shared jet doesn’t have a reason to be revoked. 

But when we decrypt a document there will be an authentication and authorization by the MIP service and during this process the unique ContentId will be created and registered. The ContentID is the unique value that Microsoft need for both the track and revoke-functionality.

By running the PS-command for tracking, Get-AipServiceDocumentLog we can see that this ContentID is registered (after the document have been decrypted/opened for the first time)imageSince the contentID doesn’t change if someone make copies of the original document all copies of a sensitive document (even outside the organization) will be revoked. The exception is the one who applied the protection that still have access to all copies of the document.

Let’s test this scenario as well!

We take the original encrypted document and make a couple copies of this document and then open this with other accounts that have permissions to the document.

All access, both successful and denied access will be logged and visible with the
Get-AipServiceTrackingLog command:image

Let’s go back to the original document with the user account who applied the protection and revoke access:image

When this is done the end-user can easily see that the document has been revokedimage

Also an administrator can revoke access to the specific document with the PS command: Set-AipServiceDocumentRevoked

When I try to open the document with one of the other users, I do get a denied access which is showed with this message (after Word had tried to access the document with the logged in account):image

Notice that if offline access is allowed for specific label, users will continue to be able to access the documents that have been revoked until the offline policy period expires.

If we run the same PS commands once again, we will now see that this document has been revokedimageAnd the central tracking log shows that we got an attempt to open this document after its revocation

image

Limitations and workarounds

One limitation in the current preview is that documents that have been uploaded to SharePoint Online cannot be revoked by the owner. This applies to SharePoints tenants where AIP integrations have been enabled. The reason is simply that SharePoint then decrypts the RMS protection for the document during upload/storage and contentID is then removed from the document. If a user downloads the file from SharePoint and accesses it from their local machine, a new ContentID is applied with the RMS protection to the document. In that case an administrator needs to identify the new contentID and assist the user to revoke access.

There is a couple of other workarounds to prevent the above (current) limitation:

  1. If end user revocation is a business requirement for all protected documents don’t enable AIP integration with SharePoint Online
  2. To be sure that you can revoke a certain information class/label. You can prevent uploading to SharePoint with this label by using EndPoint DLP or MCAS
  3. If there is a business requirement to be able to revoke files stored at a certain SharePoint site/library there is a work around to enable IRM for this library. In that case protected files that are uploaded to this library won’t be decrypted.

For the organizations that haven’t migrated from the classic AIP client to the unified labeling client because of the lack of Track and Revoke feature, can now start to plan the migration. Read more about the feature release notes here

For more details around the new Track and Revoke feature go to Microsoft docs

Publicerat i Microsoft Information Protection | Märkt | Lämna en kommentar

Endpoint DLP helps you meet the business requirements

The most common reason to information leakage is basically human mistakes!

Different kind of data Loss Prevention (DLP)-solutions can be helpful to assist our users to follow the company guidelines around information handling. Microsoft have just announced their new Endpoint DLP as General Available!

Endpoint DLP can be useful in several scenarios. It can be used to alert on different actions, both for end-users as well as the admins. It can also be used to prevent or warn the end-user , this can be really helpful in educational purposes. Increasing the knowledge of information management among our users can often be the best protection for our information.

A common business requirement that I have heard of (mostly from organizations in the public sector) is that some information is not allowed to be stored in a cloud service. A combination of Conditional Access (that limit the access only for managed devices) and Endpoint DLP for these cloud services can be used to meet these needs.

image

But let us have a look how to configure this in the compliance portal.

When we create a DLP policy we define what kind of location this is for.
Endpoint DLP is for our devices and works (today) for Windows 10. We can easily test this for a small amount of users by defining this policy per user or group.

image

We can then create rules with conditions for certain information based on:

  • Included information types (everything from predefined types like credit cards, personal ID´s to custom information types)
  • Sensitivity of the information based on its Sensitivity label

image

We can also exclude content based on the same two options (information type/label) if there is a need for that.

When these conditions are met, we can then decide what we want to do around these types of actions. We can choose to

  • only audit the specific action
  • block the action with the possibility for the end-user to override
  • Block the action

image

The above activities:

  • Upload to cloud services or access by unallowed browsers
  • Access by unallowed apps

are based on central configured EndPoint DLP settings.

Here we can for instance add our unallowed apps. In this business case we had a specific label that was not allowed to be stored in Office 365, therefor we had to add Microsoft Teams as an unallowed app. Other unallowed apps could be different sync agents for instance the DropBox, Itunes and OneDrive that could prevent syncing the relevant classified information.

image

The end-user experience for a blocked app will be like this:DLPTeams 

To be able to restrict uploading of content to different web services we must exclude browsers that does not support Endpoint DLP. Notice that we do not stop these browsers (or specified unallowed apps) to run, we just block them to be used with certain information, defined by our DLP rules.

image

Endpoint DLP with Microsoft Edge.

For our restrictions to either “block” or “block with override” for uploading to defined cloud services, this is based on central DLP Settings. This function requires the Microsoft Edge browser

We can run this in a black- or whitelist scenario where we can either allow defined domains and block all the rest or we can choose to block defined domains.

In my business case where a specific label was not allowed to be stored in Office 365 (or Google) we defined the domains for these services.

image

The end-user experience for a block with override policy for a defined domain will be like this:
DLPOneDrive

Regardless if the action is to block our just Audit specified action, we can define different notification options (per policy). If we want to notify the user or somebody else in the organization, we can do this by email.

image

We can also trigger an incident report and define what kind of sensitivity the specific incident should have.

image

An important take around DLP is that as soon as you block the user from something, you need to have an answer to how they should solve the business need instead. If you block too much there is always a risk that your users will use another (unsanctioned) service to do their work. In that case you will lose control completely and will have what is called a Shadow IT.

Publicerat i Microsoft Information Protection | Märkt | 5 kommentarer

Let’s defend ourselves!

Maybe not yourself, but your organization! Smile

Ignite have recently ended with a lot of news from Microsoft. One of biggest news around threat detection and protection is the latest integration of all security solutions for our M365 environment. Based on my own as well as my company’s experiences this is a success factor for identifying and prevent intrusions before they do harm.

Lets do an example to explain this a little bit more.

Think of your environment like this:

image

Most of us still have an on-premises environment including local Active Directory, servers and clients. We got a cloud environment with Office 365 and Azure Active Directory and we maybe got other cloud services as well.

Then we have our security solutions that protects our clients/servers, our cloud solutions, and our identities. All these solutions can identify different kind of threats and give us alerts that could be really critical, or just be the daily noise of non-critical alerts.

Lets do some examples

  • What if we have a user where we see authentication alerts like unfamiliar sign-ins, impossible travels etc.? Of course, this could be a false positive because he is using his own new VPN service.
  • What if the same user is trying to access local resources that he doesn’t use to, for instance in a unusual time in the middle of the night. This could be a false positive alerts because he have a new role and working late.
  • What if the same user running advanced PowerShell commands on his company device? He might be taking a PowerShell course.
  • What if he downloading a lot of files from a SharePoint/Team site? He may be planning to work offline.
  • What if he sending highly confidential files to a private email address? I don’t add any suggestion here, but you may be interested in the newly released Insider Risk Management as well ?

I do think that you got the idea. If any of these alerts have been raised there could be a non-critical alert. But if we are seeing a combination of alerts from different services there is a really high risk that we got something critical going on. When it comes to preventing an attack, it is extremely time critical and going through different kind of alerts often takes too much time.

Microsoft have now released the Microsoft 365 Defender that is not only getting alerts from all these different security solutions, it is doing much more…

image

The Microsoft 365 Security -portal generate automated incidents based on all these security solutions. Gives us one single portal that helps us prioritize and getting insights in the most ongoing critical alerts and risks for the moment. In several cases the generated incidents can mitigate the attack automatically or make it easier to take the correct action manually to prevent the attack. What is also time consuming is to identify what a bad guy have been doing during a period, all these integrations are helpful in these scenarios!

For the more experienced security administrators, there is also Advanced Hunting with virtually unlimited possibilities. My colleagues who work for Onevinn’s MDR service have been working on this for a long time and are building impressive threat-hunting queries towards all these services and also more services. This is often a critical proactive step during an ongoing attack

Microsoft have also chosen to rename a lot of these services to complete the Defender story:

  • Microsoft Defender for Office 365 – Office 365 Advanced Threat Protection (Office ATP)
    Protect our collaboration services from Exchange Online to Teams
  • Microsoft Defender for Identity – Azure Advanced Threat Protection (Azure ATP)
    Identifies threats in our local environments based on signals from our domain controllers
  • Microsoft Defender for EndPoint – Microsoft Defender Advanced Threat Protection (Defender ATP)
    Detect and response on threats on your endpoints, from computers, tablets, cellphones to servers
  • MCAS, Microsoft Cloud App Security still have the same name. MCAS protect our cloud apps, Office 365 and other 3-party cloud apps. MCAS also integrates with Azure Active Directory Identity Protection that protect our identities in Azure AD. All of these important signals from our cloud identity and our connected cloud apps are shared with Microsoft 365 Defender.

How to get started?

Just go to https://security.microsoft.com
If any of the above services are in use, you ready to onboard your tenant.
Find more information on Microsoft docs

Publicerat i Microsoft Defender, Threat Protection | Märkt | 2 kommentarer